Classic Sourdough Bread made Easy – My recipe for classic sourdough bread which is a winner every time I bake it; and, it can be proved overnight in a cool place for early morning baking.
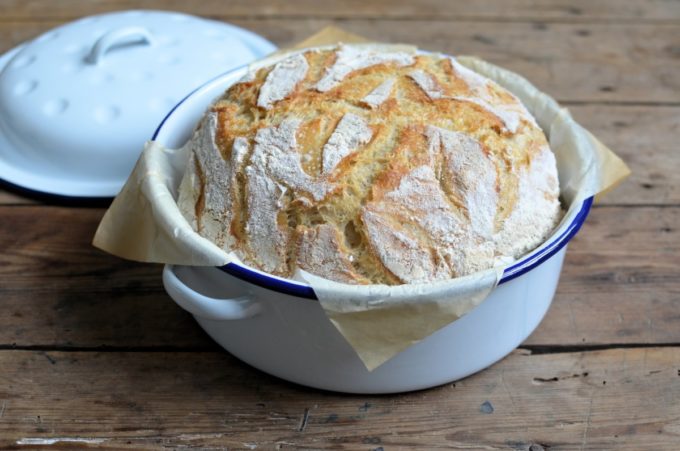
Sally the Sourdough Starter!
Ad – Gifted: I was sent some sourdough starter to use but was not asked to write a favourable review about it
As most of my followers will have seen over the last three months, I have become a sourdough addict, or perhaps I should say a sourdough whore!
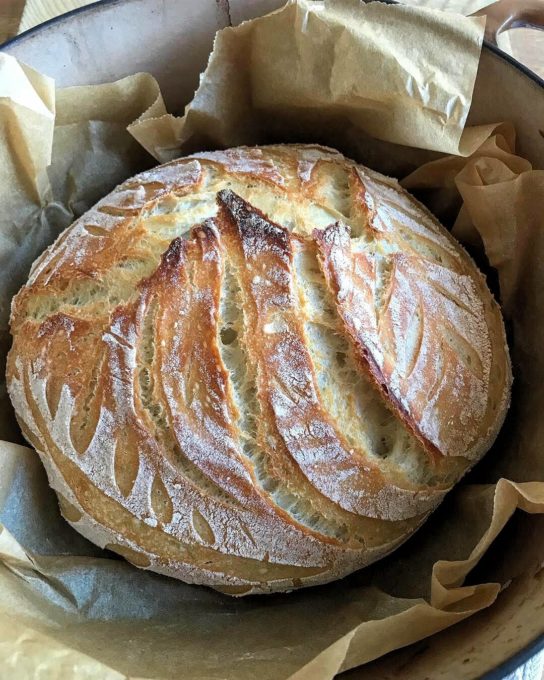
Every two to three days I liberate Sally, that’s my sourdough starter, from the fridge and revive her with a good feed.
This all started when I sent some sourdough starter from my good friend Elaine, over at Foodbod Sourdough….Elaine very kindly sent me some of her starter to use and review, and eh voila, I was instantly hooked.
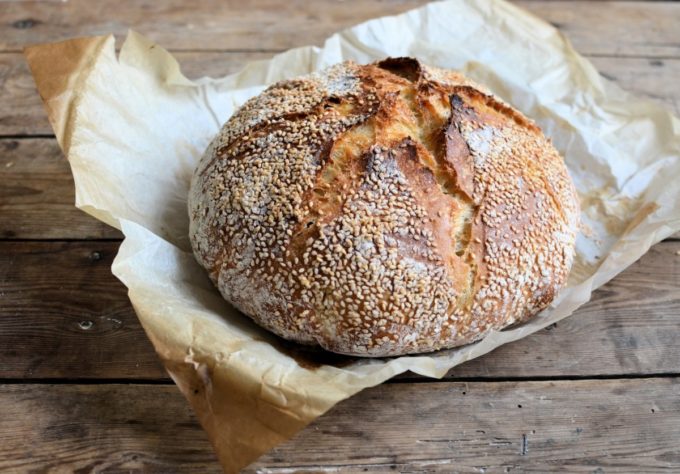
As regular readers will know I am an avid baker and have an affinity with yeast and dough; but, to date, apart from a brief skirmish with some French bread baking and namely “sponges”, I’d never made a “full-blown” sourdough loaf, so I was keen to add this new type of bread to my repertoire.
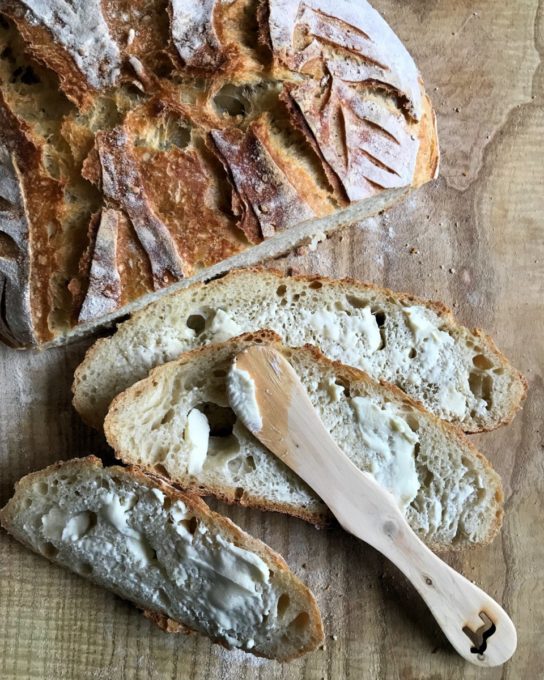
Today’s recipe for Classic Sourdough Bread made Easy is based on Elaine’s master recipe, using the starter she sent me three months ago, but with some tweaks I have added for what works best for me.
I used Elaine’s brilliant recipe for several weeks, but as each kitchen is different, as in temperature, your oven and the flour you may use, today’s recipe evolved by me making amendments here and there, until I now feel confident enough to share the recipe, which has been tested multiple times and with great success.
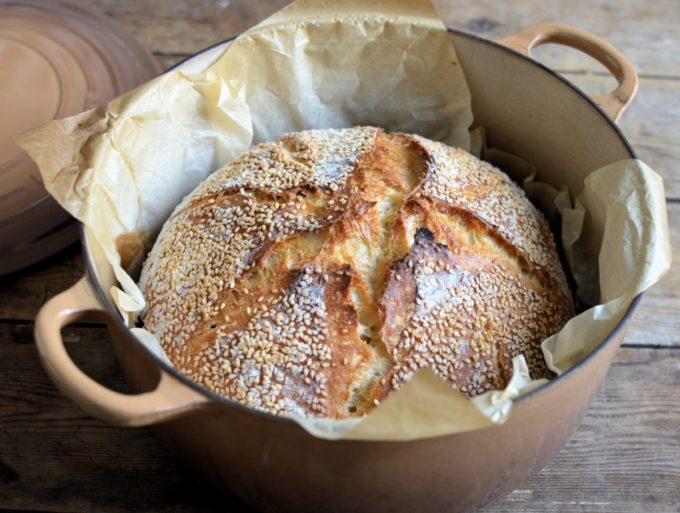
What Pot to Bake Sourdough Bread In
I changed the cooking pot I bake my bread in, from enamel to cast iron, again, it just works better for me that way, but enamel may work better for you as it does for Elaine….it’s all trial and error.
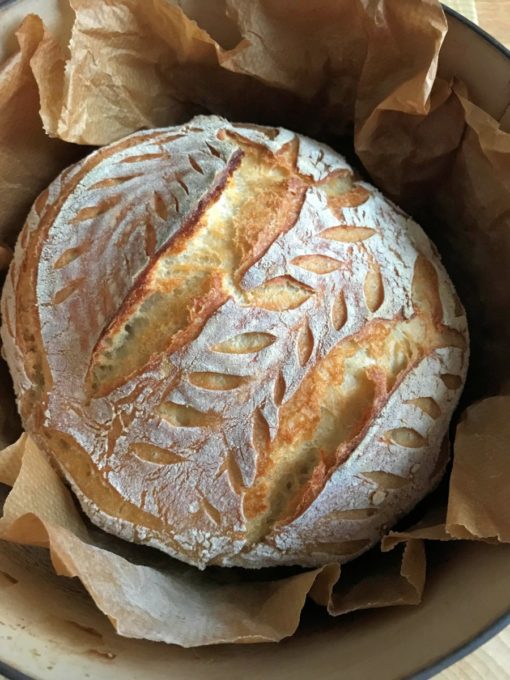
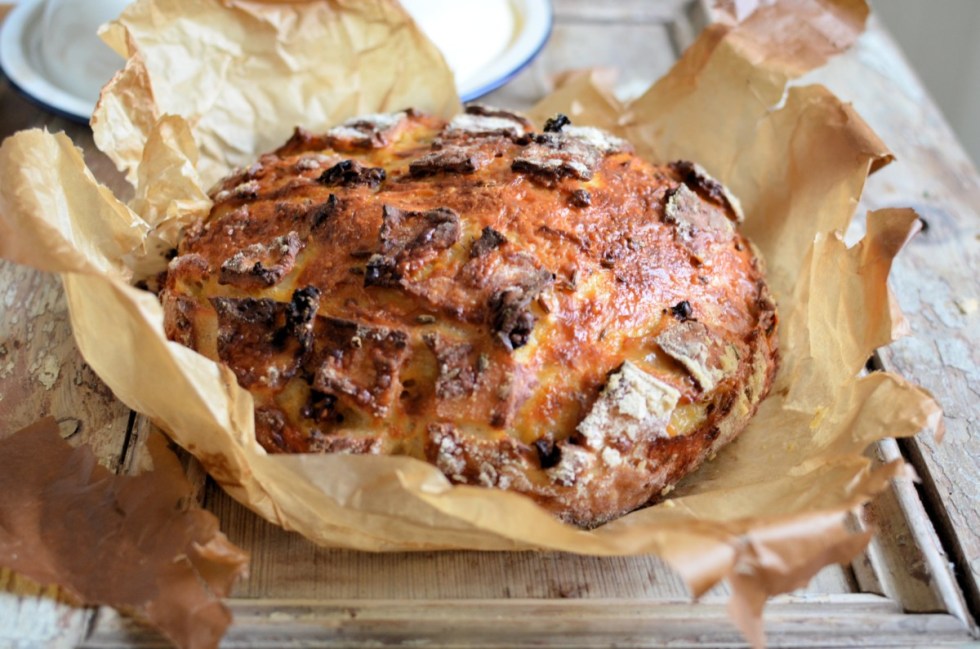
So, throughout this post you will see various sourdough loaves I have made, in enamel pots and cast iron pots.
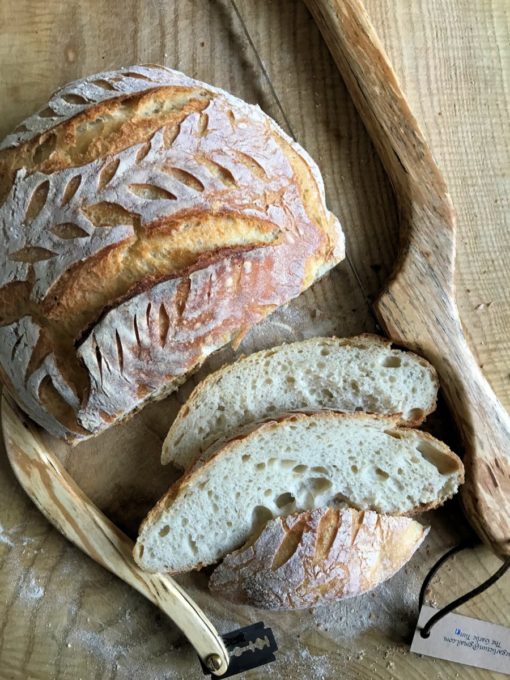
But, the recipe I have shared below suggests you use a cast iron pot, as I do all the time now, AND always with the lid on during baking too.
As you can see from my photos, Sally the sourdough starter is a STAR, (which is what Elaine calls it) and continues to provide me with incredibly strong wild yeast to make my daily bread.
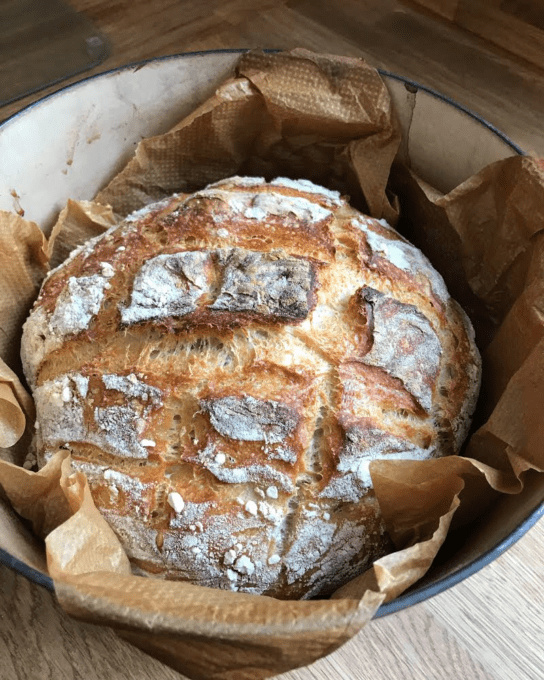
Benefits of Sourdough Bread
And, we (Malcolm my husband and I) both find that we can digest sourdough bread better, and we don’t feel so “bloated” after eating it as we often do with normal yeast raised bread.
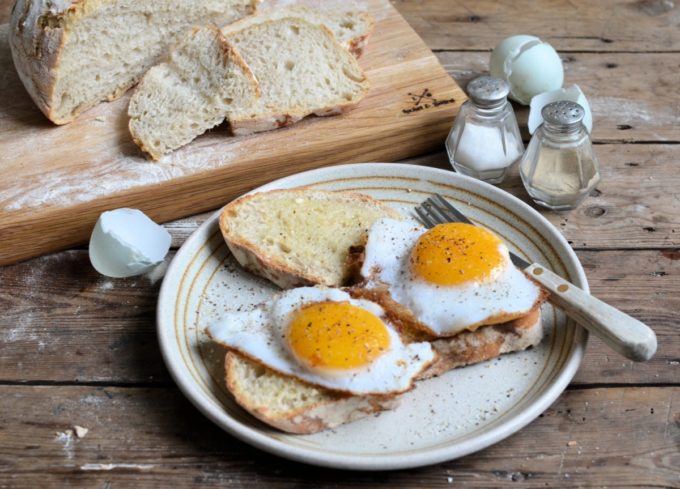
It makes the most sublime toast and is a fabulous vehicle for sandwiches of all types. Cut a big wedge off the crusty end to go with soup, and you’re in sourdough heaven, similarly it makes fabulous croutons too.
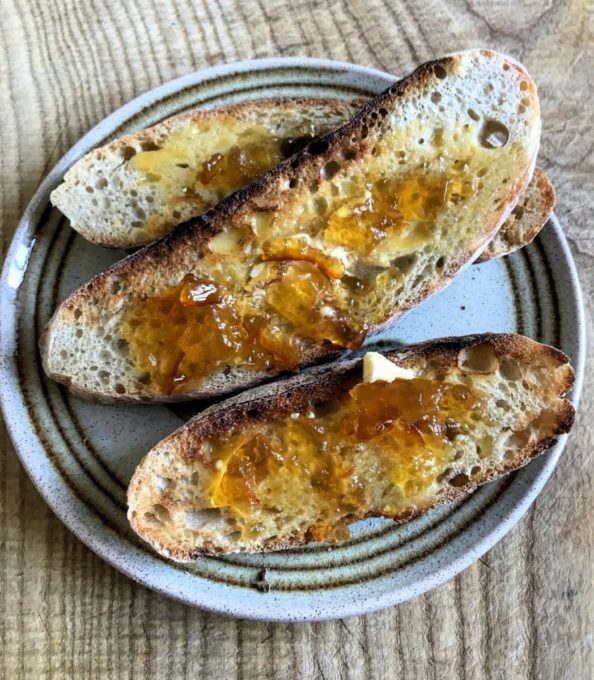
How Easy Is Sourdough Bread?
I don’t profess to be an expert at sourdough bread, but it seems that I have the “touch” when it comes to this type of bread, and as an instinctive bread maker, the recipe I’ve shared below is tried and tested, and, it works.
I read somewhere, I’m not sure where, that when bread dough is proved long and slow, and in a cooler temperature, it has a better structure and texture.
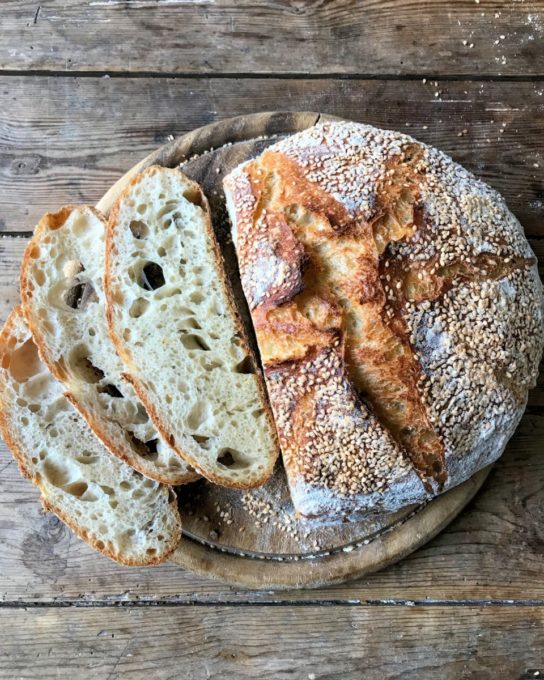
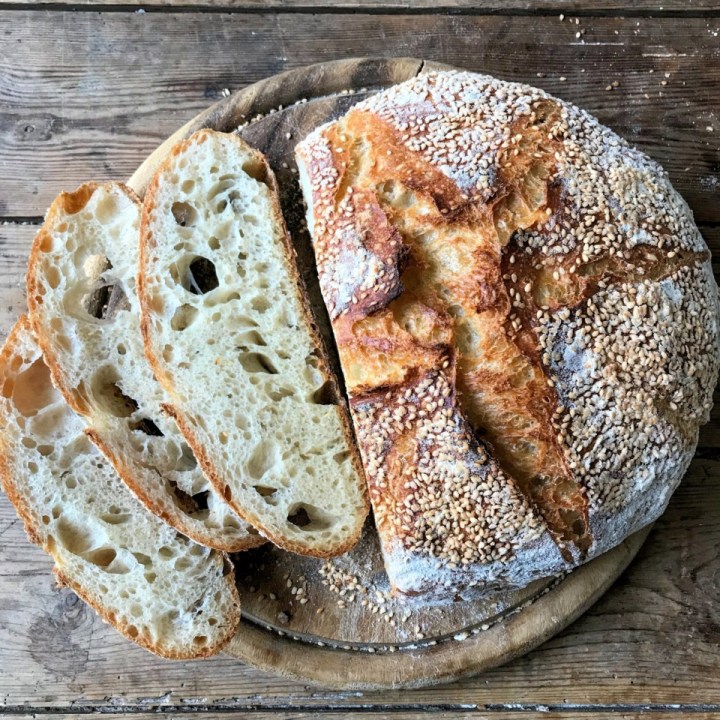
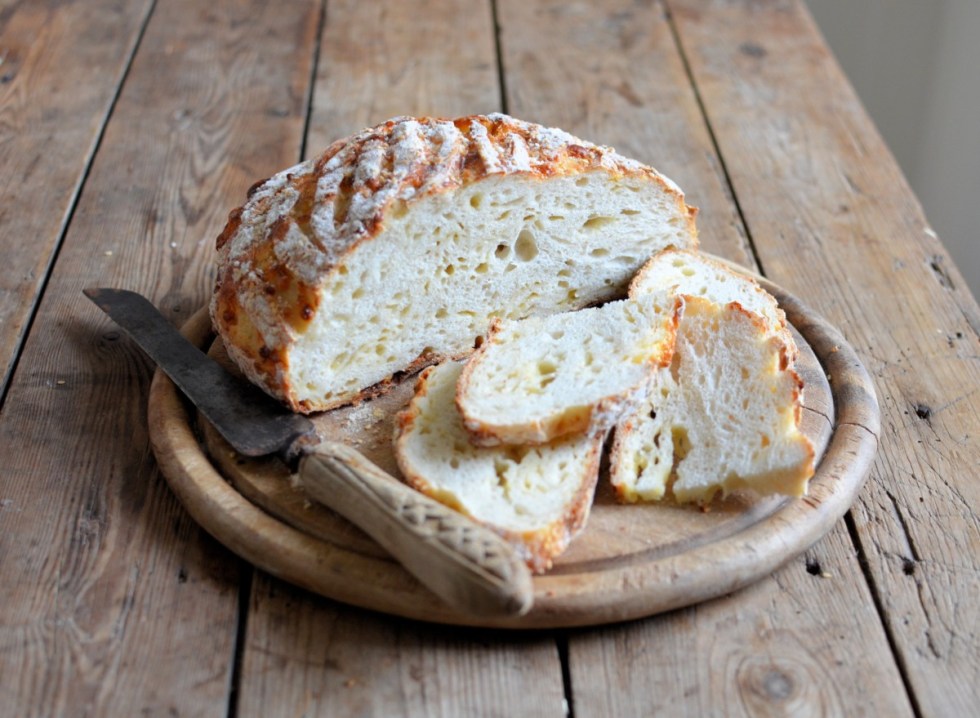
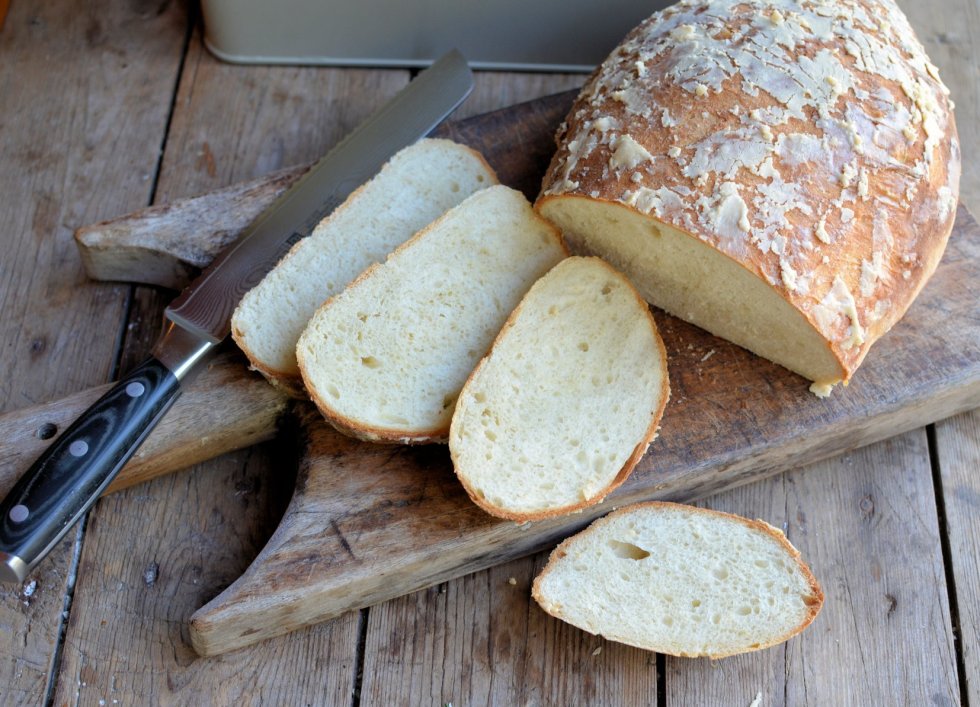
And it’s true that since switching to proving the dough (in a banneton) overnight in a cool place, my bread structure has more of those sought after “sourdough holes”, with a chewy and pleasantly sour texture and taste, as well as a fabulous crusty crust.
I have yet to make a sourdough pizza or bread rolls, but both of those recipes are in the pipeline, so do keep popping back to see what my next wild yeast recipe is.
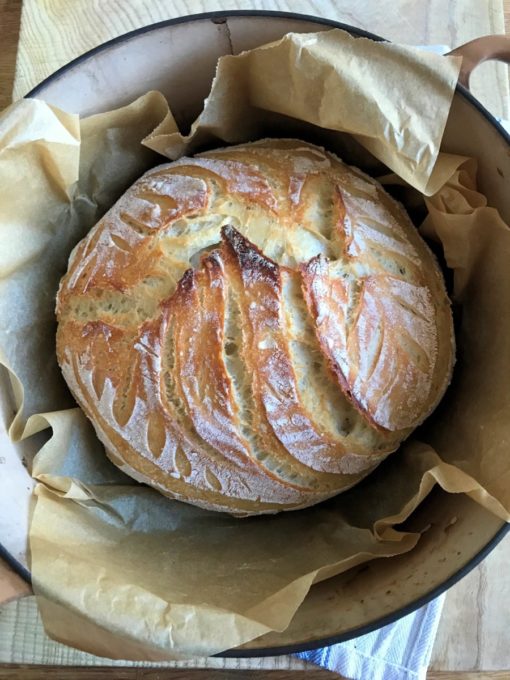
My Classic Sourdough Bread made Easy recipe is shared AT THE END OF THIS POST in a printable recipe format and please do let me know if you make it.
I will be back soon with some more sourdough ideas, as well as travel stories and new recipes. Once again, thanks to Elaine for sending me some of her starter that led me on this fascinating sourdough journey. Bye for now, Karen
Pin Me!

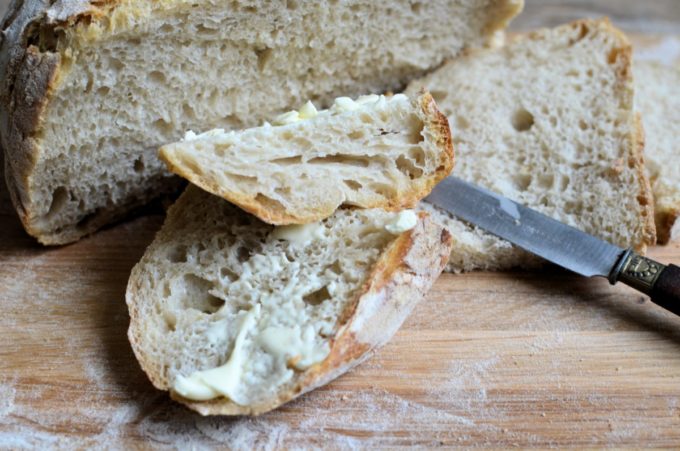
Step-by-Step Instructions
Keep scrolling to find the full and printable recipe at the bottom of this post.
- 2 to 3 hours before you want to start your sourdough bread, take the starter out of the fridge and feed it with 40g filtered water and 40g strong white bread flour. Mix well, cover with cling film (or a shower cap) and set to one side to start working.
- After 2 to 3 hours the starter should be frothy and light with lots of bubbles and it may be making a noise, as in singing! It’s now ready to use.
- Put the covered starter back in the fridge until it is needed next time you want to bake.
- Place a bowl onto some digital scales and set the tare to zero. Add 60g of sourdough starter and set the tare to zero again; then add the salt and water, again, I find it easier to set the tare to zero before adding the flour.

- Take the bowl off the scales and mix well, it will look rough and lumpy, but never fear it will soon start to look like bread dough! Cover the dough with cling film/shower cap and set to one side.
- After an hour, uncover it and with your hands, bring the dough from the outside, and fold it into the middle. Do this for about 15 to 20 times – I find it is easier if I rotate the bowl at the same time. Cover it and set to one side.
- Do the folding and turning action two or three more times over the next few hours, by this time the dough will be smooth, elastic and sticky.
- I start this at about 3pm to 4pm and the dough is ready at about 8pm to 9pm.
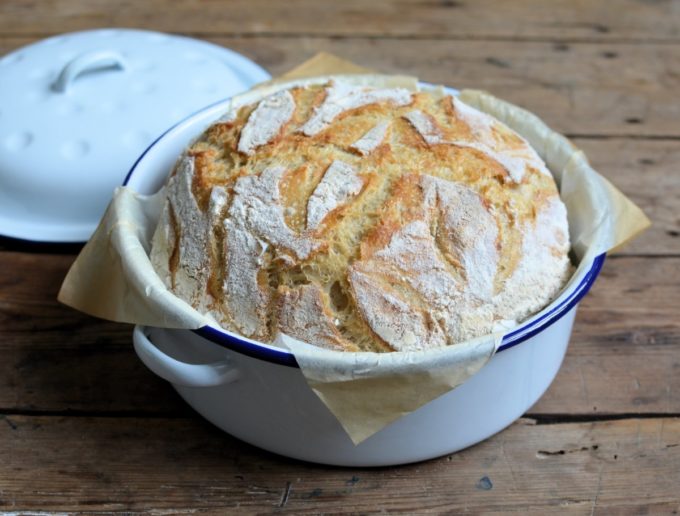
- Once the dough is smooth and elastic (see above) and it will have risen by now too, take a 22cm (9″) to 24cm (10″) banetton basket and dust it with rice flour.
- Do one more set of folding actions with the dough and then place the ball of dough into the floured banneton basket. Easing the dough up around the sides, sprinkle some more flour around it and then sprinkle some over the top of of the dough.
- Cover with cling film/shower cap and set to one side in a cool place to prove overnight. (I use my pantry which is about 14 degrees C)
- In the morning, the dough will have risen overnight and you will have a large, round ball of smooth dough that’s ready to bake.
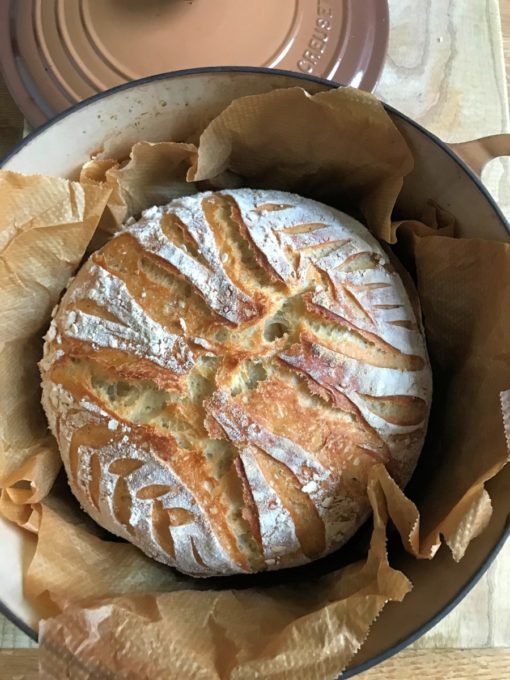
- Pre-heat the oven to 230C/220C Fan/450F/425F Fan/Gas mark 8 and line a large 30cm (15″) cast iron casserole dish (Dutch oven) that has a lid, with grease-proof baking paper.
- Uncover and invert the dough into the cast iron pot and then score the top with a lame or a razor blade.
- Place the lid on the pot and bake in the pre-heated oven for 50 minutes until the bread is well-risen, golden brown and with a crisp crust.
- NB: if you want a darker crust, take the lid off and bake for a further 5 to 10 minutes.
- Carefully turn the loaf out onto a wire cooling rack and allow to cool for 1 hour before slicing it. Store it in the cooled cooking pot.
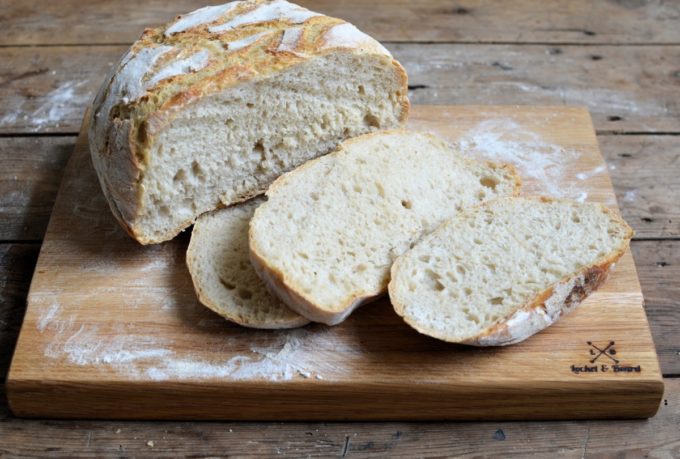
More Bread Recipes
Pin Me Too!

Easy Sourdough Recipe
Easy No-Knead Sourdough Bread
My recipe for an easy no-knead sourdough bread which is a winner every time I bake it; and it can be proved overnight in a cool place for early morning baking. It makes the most sublime toast and is a fabulous vehicle for sandwiches of all types. Cut a big wedge off the crusty end to go with soup, and you’re in sourdough heaven, similarly it makes fabulous croutons too.
Ingredients
- 60g recently fed sourdough starter
- 5g teaspoon sea salt
- 320ml tepid filtered water (or boiled water)
- 500g strong white bread flour
- Rice flour (for dusting)
Instructions
2 to 3 hours before you want to start your sourdough bread, take the starter out of the fridge and feed it with 40g filtered water and 40g strong white bread flour. Mix well, cover with cling film (or a shower cap) and set to one side to start working. After 2 to 3 hours the starter should be frothy and light with lots of bubbles and it may be making a noise, as in singing! It's now ready to use. Put the covered starter back in the fridge until it is needed next time you want to bake.
Place a bowl onto some digital scales and set the tare to zero. Add 60g of sourdough starter and set the tare to zero again; then add the salt and water, again, I find it easier to set the tare to zero before adding the flour. Take the bowl off the scales and mix well, it will look rough and lumpy, but never fear it will soon start to look like bread dough! Cover the dough with cling film/shower cap and set to one side.
After an hour, uncover it and with your hands, bring the dough from the outside, and fold it into the middle. Do this for about 15 to 20 times - I find it is easier if I rotate the bowl at the same time. Cover it and set to one side.
Do the folding and turning action two or three more times over the next few hours, by this time the dough will be smooth, elastic and sticky. I start this at about 3pm to 4pm and the dough is ready at about 8pm to 9pm.
Once the dough is smooth and elastic (see above) and it will have risen by now too, take a 22cm (9") to 24cm (10") banetton basket and dust it with rice flour. Do one more set of folding actions with the dough and then place the ball of dough into the floured banneton basket. Easing the dough up around the sides, sprinkle some more flour around it and then sprinkle some over the top of of the dough. Cover with cling film/shower cap and set to one side in a cool place to prove overnight. (I use my pantry which is about 14 degrees C)
In the morning, the dough will have risen overnight and you will have a large, round ball of smooth dough that's ready to bake. Pre-heat the oven to 230C/220C Fan/450F/425F Fan/Gas mark 8 and line a large 30cm (15") cast iron casserole dish (Dutch oven) that has a lid, with grease-proof baking paper.
Uncover and invert the dough into the cast iron pot and then score the top with a lame or a razor blade. Place the lid on the pot and bake in the pre-heated oven for 50 minutes until the bread is well-risen, golden brown and with a crisp crust. NB: if you want a darker crust, take the lid off and bake for a further 5 to 10 minutes.
Carefully turn the loaf out onto a wire cooling rack and allow to cool for 1 hour before slicing it. Store it in the cooled cooking pot.
Notes
I have recently experimented with the cold oven method, and it works like a dream. At step 7, place the bread into the pot and into a cold oven, then set the temperature for 230C/450F/Gas mark 8 and bake for 1 hour. Again, if you want a darker crust, take the lid off and bake for a further 5 to 10 minutes extra.
Nutrition Information
Yield 12 slices Serving Size 1Amount Per Serving Calories 208Total Fat 1gSaturated Fat 0gTrans Fat 0gUnsaturated Fat 0gCholesterol 0mgSodium 164mgCarbohydrates 43gFiber 1gSugar 0gProtein 6g
Nutrition information is an approximate calculation based on the ingredients listed and it can vary according to portion sizes and when different ingredients are used.






Jayne says
I’m very excited about this. I keep reading that you can make sourdough in a Le Creuset-type dutch oven, but I don’t have one (and don’t have room for anything else, even a very small mouse, in my cupboards) But I do have enamel roasters, so I am up and running. Now I just need to get some sourdough starter! If you are making normal yeasted bread, I do find that fresh yeast causes less of the ‘bloat’ than the rapid action dried stuff – I think there are some horrid additives in there to make it work faster.
Karen Burns-Booth says
Enamel roasters are GREAT too, and I use them sometimes, with a lid of course, so DO try baking your bread in an enamel roaster. I use a large round 26cm roaster, although I started off with a 22cm one! I agree re yeast, fresh yeast is so much better than dried fast action yeast. Karen
johanna @ green gourmet giraffe says
Welcome to the world of sourdough baking – I can see it is very much in tune with your style of baking and your loaves look really beautiful. I do an overnight sourdough loaf but it uses much more starter – I might have to try this one day and see how it turns out (esp if I am low on starter – I made a fasttrack sourdough pizza regularly that my 9 year old has mastered and after making it I sometimes want to make bread but need to feed my starter so this recipe could be perfect then. BTW I like your new look – v retro
Karen Burns-Booth says
Thanks Johanna, it’s been a revelation this sourdough baking, and I do it every other day now, and instinctively too! I have seen recipes for 100g starter and have thought that’s a lot, but I used to use 50g, as per Elaine’s master recipe, but find 60g is better for me, with a chewier texture and more holes! LOVE that your 9 year old is into the baking side of sourdough too! Thanks for your lovely comments about my new look, it’s to match the branding of my new book! Karen
Leonie Bennett says
Ive been making sourdough but it doesn’t rise much. The recipe I used has a lot more sourdough. I’d like to try your recipe but I’m a bit puzzled. Do you use 60g starter in total or 60 plus the additional 40g flour and 40g water?
Thank you.
Karen Burns-Booth says
I use 60g starter
Karen says
These look amazing the markings are stunning
I love baking sourdough but have never tried in a dutch oven or enamel roaster – what size do you use for this recipe please?
Karen Burns-Booth says
I’ve stated in the recipe to use a 30cm/12″ cast iron pot/Dutch oven with a lid, this gives the bread room to expand and rise. But, I have also used a 26cm/10″ one too. Hope that helps, Karen
Sue says
Your bread always looks so amazing. I have been dabbling with sour dough during lockdown and have made a starter that’s quite lively. I add a little when I make a normal loaf too. I have been following your recipe and although I haven’t got a banneton yet, I have cooked it in a normal loaf tin. But my dough was quite sticky. I have done it again tonight and again very sticky… it wouldn’t hold its shape without the bread tin. Any ideas? Should I just use less liquid? Thanks in advance.
Karen Burns-Booth says
Hi Sue, that’s exactly right, reduce the hydration and use less water, try 300ml and see how that is. Different flours has an impact too, a high protein flour with a protein level of 13% or higher is best for sourdough bread. I hope this helps? Karen
Karen Burns-Booth says
Thanks Karen, I love the scoring bit of the bake! I use a 30cm/12″ cast iron Le Creuset pot with a lid, and a 26cm/10″ enamel roaster with a lid, both round. So anywhere between 26cm/11″ and 30cm/12″ is fine for this bread. Karen
Gavin Baxter says
Bread looks great. I’m intrigued by the cold oven method. Would you bake for an hour after the oven has reached 230C or an hour total? Goes against the usual advice that everything must be very hot when the dough hits the oven .
Karen Burns-Booth says
Hello Gavin, so it is exactly as I stated in the recipe, you put your covered pot of sourdough in the oven, cold, and then set the temperature to 230C and bake for 1 hour, take it out, and if needs be, bake for a further 5 to 10 minutes without the lid of a darker crust. I have never had to do that thus far, as we prefer a medium crust. Hope that helps? It really does work, and some of my followers on Instagram shared photos, as I have I, of their baked bread using the cold oven method. Karen
Kiley says
Hi Karen,
The recipe states to put the dutch oven (with dough inside) in the pre-heated oven. But you are stating here in the comment it’s supposed to be put in the oven while it’s still cold. Can you please confirm which is correct. Is the oven supposed to be pre-heated and hot or should it say in the pre-heating oven which would mean still cold and coming to temperature.
Thanks!
Karen Burns-Booth says
I add the fact that you can bake it either way – the cold oven method works just as well as the hot oven method.
Ron says
Karen, I love baking bread in my 26 & 30 cm Le Creuset Dutch oven. I have a starter (nameless) that just doesn’t give me the flavor I wish to have. Perhaps it because the starter is nameless. Next feed and bake, I’m going to Christen the stater “Louanne” and if the taste isn’t better soon I’m off to Foodbot for a new starter.
Karen Burns-Booth says
Well let’s hope that now your starter has a name, it might start preforming better Ron! Let me know how you get on with Louanne! Karen
Elaine @ foodbodsourdough says
Thank you so much for including me & my starter & recipe in this lovely post. Your loaves all look amazing, I’m so glad you’re enjoying this sourdough world so much xxx
Karen Burns-Booth says
It’s been a revelation to me Elaine!!! Loving baking a loaf every other day or so! Thank you again, Karen
Clare says
Thank you for this post, it’s been a couple of years since I did sour dough, but I love it and your routine will work well for us. Hoping to get some starter for the weekend and give it a go.
Karen Burns-Booth says
Brilliant – so pleased this has inspired you to make some sourdough again Clare! Let me know how it turns out. Karen
Clare Mansell says
Sour dough just been fed (I was back here to conult your method!) and I shall report back tomorrow…
Karen Burns-Booth says
Great stuff – hope it’s all bubbling away nicely, Karen
Glynis Rowntree says
Hi Karen,
Failed miserably the last time I tried sourdough so have bought some of STAR and am going to try your method. Could you please tell me what you store your SALLY is as Elaine rexommends a glass bowl and not a jar.
Karen Burns-Booth says
Hi Glynis – I store my starter (Sally!) in an earthware crock, small to medium bowl covered with a showercap! Karen
Glynis Rowntree says
Hi Karen, I have now made a lovely Sourdough but the only thing is that the bottom crust is a little tough. I tried putting a tray on the lower shelf and it has improved a little. Can you recommend anything. I am using an enamel cooking pot. Do you think I will have better results with my Le Cruset casserole.
Karen Burns-Booth says
Maybe it will be better in cast iron (Le Creuset)as the pots are thicker and distribute heat more evenly. Karen
Glynis Rowntree says
Thank you, Karen. I will give it a go next time.
Jayne says
Hi Karen, just made two more loaves – both look gorgeous, still cooling down as we speak. Interestingly, as I have no proving baskets here (we’re still in Turkey at the minute) and I only have one enamel roasting pot and one basin the right size for the final prove, I decided to prove one of the loaves actually in the enamel pot itself (lined with baking paper) and then put it straight in the oven. It came out a treat – I’ve had one or two problems in the past, getting the dough to dislodge from the bowl I’ve proved it in when I haven’t been able to use a basket, which has once or twice resulted in the loaves leaking some of their air. I think I’m going to go with proving in the pan in future, if I haven’t got access to a basket. On another note, I have to tell you that I brought a little pot of my sourdough starter with me to Turkey – it was in a well sealed (I thought) plastic container that had originally contained Cornish sea salt – with the kind of lid you get on those help-yourself deli pots in the supermarket. It was then inside two Ikea ziploc bags. Despite all that, it got out into my suitcase. We were staying for a couple of nights en route to our house, so I ended up having to choose the least-affected garments and had to chip off bits of dried up glue-like sourdough starter from them. Oh dear. I am pleased to say there was just enough starter left inside one of the Ikea bags to get it started again (far more important than a bit of sourdough on my dresses!) The perils of sourdough…
Angela says
Such a great recipe and a beautiful product. I’ve made it twice and have a third loaf going right now. Thanks!!
Karen Burns-Booth says
That is BRILLIANT Angela, thanks for letting me know! Karen
Beth Shervais says
I have my first loaf in the oven now but just a quick question for future. I read somewhere that letting it rise two or more times before baking will give it a more sourdough flavor? What do you think?
Karen Burns-Booth says
I have never heard of that and a strong sourdough starter will always yield a sour flavour bread. Give it a go if you have time and let me know! Karen
Elena B says
Hello Karen. My first sourdough breads were placed in a cold oven a few minutes ago, as suggested in your notes above. I used a friend’s starter by feeding it for a day. Was not sure how that would go. Had a tiny 5 oz jar with a gummy mass inside. It was refrigerated and did not look promising. But forever the optimist, I fed the starter, placed my glass measuring cup in a larger bowl with hot tap water , covered with a bath towel inside my prewarmed oven and waited most of a day. Finally toward evening lovely bubbles appeared in my starter. By 3 pm I mixed my first sourdough following your recipe, except I doubled it. Kneaded it in my Kitchenaid mixer because I was rather tired. After a minute in the power mixer, the dough separated nicely from the bowl, forming a sticky mass around the hook. Then I tipped the dough onto a floured stone counter. Kneaded and turned it a few times. It smelled and behaved beautifully. Became easy to handle with very little four. At about 8:30 pm I cut the dough into two unequal pieces. About two thirds went into a towel lined oblong bread pan. One third went into a smaller , fabric lined 8″ basket. Both went into my cold oven covered with a towel.
Woke up at seven today. Prepared two baking pans by lining them with loose parchment paper. My home oven is small. I could fit an oval 18″ Graniteware roaster and one 8″ bread pan.
My proofing baskets were overflowing with dough this morning. It felt cold and fragile. But not discouraged, I tipped over the smaller basket. The dough collapsed slightly. I tucked it under gently, dropped it into the smaller bread pan. Dropped a bit of fine flour on the top and scored the surface quickly with a serrated knife. And covered it with two layers of foil to give it some protection from the heat.
The larger proofed dough clung to the towel, unfortunately because there was not enough flour apparently. Nonetheless I extracted the longish mass of dough trying to preserve its elongated shape. Tucked it under itself and placed it gently onto the parchment lined roasting pan. I sprayed the pan and lid with water first to give it some steam. Scored the floured surface quickly. . Covered the pan with the lid.
Both pans Barely fit into my oven, but In they were. Set my oven to 425 F and left them for what will come.
Now I will find out shortly what I have: a collapsed disaster times two perhaps?
Karen Burns-Booth says
Hello Elena,
Firstly, thank you for your concise comments here, I’ll attempt to reply to you in full.
1. The fact you’ve doubled the quantity of bread dough may have contributed towards your “fragile” dough this morning. As a home baker and not a commercial baker, I’m very wary about dealing with large amounts of dough.
2. The cold oven method has only ever been tried out when using a covered enamel or cast iron casserole dish. So, we’ll see if your method works out based on your small oven!
3. I’m interested to see how your adaptations of this master recipe work out!
Karen
Elena says
Thank you for your input on the double recipe, Karen. .As I mentioned, only the larger portion was in a covered graniteware roaster. The smaller portion could not be in a covered pot like my cast-iron pot, so I squeezed it into a bread pan with aluminum on top. It was a makeshift decision, Both breads baked, though the larger one in the covered roaster rose better and had a nicer . rosier top. I would like to show photos if I can figure out how to share them on this site. I look forward to your comments.Many thanks for this beautiful and substantial blog site. I have yet to explore your many recipes and tip. Many thanks, Elena
Karen Burns-Booth says
Thanks for clarifying all of this Elena, and I am so pleased that the bread sounds as if it was a success too.
I am not sure how you can add photos here, but you can send them to me if you wish, via my contact page, and I will see if I can add them.
Karen
Julie says
Can you tell me what you use to get these same seeds to adhere to the top of your bread before baking.
Thank you
Karen Burns-Booth says
I add them to them to the bottom of the banneton for the overnight retard proving. Karen
Jenn says
Do you have to use rice flour?
Karen Burns-Booth says
It is highly advisable as normal wheat flour clogs and creates a tougher crust if it’s too think. Cornflour would work if you don’t have rice flour.
Anna says
On my second loaf now and absolutely love it! About to do some of your sourdough hotcross buns too. My only thing is the dough seems to spread a bit when I tip it out of the banneton- does that mean it needs more time before the final kneed or perhaps it’s overproved?
I’m totally new to sourdough so finding it all a real thrill! x
Karen Burns-Booth says
Hi Anna
That’s great news!
Re the the soft dough, it could be a mix of things, being in too hot a place whilst proving, under proved and too much water. Try to prove it overnight in a cold place, that’s what I do and its always very firm before baking.
Hope that helps?
Karen
Kimmee says
Tastes amazing! Here is my question… When I score it my bread deflates. Am I proofing it too long or not cold enough?
Karen Burns-Booth says
It sounds as if your bread is too warm and not cold or firm enough. Karen
Kimmee says
THANK YOU! Well I’ll try a third one! You know what they say… third times a charm! I’ll stick it in the fridge overnight and see if that works! My dough is sticky… but beautiful hope that’s correct! Happy Easter!
Karen Burns-Booth says
My pleasure and Happy Easter to you too! Karen
Allyne says
Hello,
Thank you for sharing your recipe. I have an unreliable (non digital scale), and I think I put too much flour!? Os the dough supposed to be quite dry and shaggy when you first mix it? After turning it there were hard dry lumps on the bottom of the bowl. I kinda picked them out, but they were in the bread.
Is there a measurement of flour I could use ( like the water was in mls)?
Thanks!
Karen Burns-Booth says
Hi there – the mixture is dry and raggy after initial mixing and becomes smooth and elastic after an hour or so. The flour is 500g in weight, the water 320mls, and the starter is 60g. There shouldn’t be hard lumps in the dough, it sounds as if the dough was too dry. Karen
Helen Webb says
Hi I am also new to sourdough but it seemed the oerfect thing to start with the sudden time on my hands! I have my first loaf started but just wanted to ask if you feed yours straight away or discard some? I fed mine following your instrctions and it looked happy. Do you just discard it (or give it away) if it gets too big for it’s container? Thank you!
Karen Burns-Booth says
Hi Helen
You feed the starter when you want to make a loaf. Then once you have used the starter for a fresh loaf, you put it away until you want to bake a loaf again. If you don’t bake in 7 days, then you feed it and once it’s bubbly then you discard 60g and store the starter again until you need it. Hope that helps? Karen
Kelli says
I made my bread in a 22cm glass lidded pot and it turned out really well considering this is my first attempt at making sourdough bread, not quite as many air pockets in mine compared to your pictures but still a decent amount. Will definitely be making this again.
Karen Burns-Booth says
That’s great news and especially as I have never baked in a glass lidded pot before myself. The air pockets come as the starter gets stronger, and if you allow the dough to prove for at least 12 hours. Karen
Frances says
Hi Karen
Two questions, if I may….
If I use a bit more starter (say, 75g), would I need to reduce a little the amount of water I add ?
My first effort was overflowing in the proving basket after a night in a cool room – should I shape my loaf even more before putting it in the basket, and leave it in a much cooler place? I don’t have the fridge space, unfortunately.
Thank you! x
Karen Burns-Booth says
Hi Frances, it may be that where you’re keeping it overnight is too warm – so try the fridge.
Different flours make a difference too, so maybe try experimenting by reducing the water to 300g – no need to add more starter however.
I find an extra strong bread flour as opposed to just strong bread flour has more gluten and therefore keeps a firmer shape.
However, your “overflowing” banneton sounds like it’s in too warm a place, you need a maximum temperature of about 10c to 12c or the fridge.
Hope that helps!
Karen
Karen Burns-Booth says
Just seen you have no fridge space – try less water, and see what happens.
Frances says
Brilliant! Thanks so much. I’ll try both In my next few bakes – a cooler temperature, and a bit less water. However they turn out, they’ll be delicious….
It’s a real luxury to have freshly baked sourdough bread for breakfast, with a generous slathering of lovely French butter with sea salt crystals. Simple pleasures, in these unsettling times….
X
Frances says
Karen, can I ask one more thing. I haven’t got on very well with a proving basket – can I prove my dough in the Dutch oven itself overnight, score it and then just put it into a cold oven as you suggest? Thanks
Frances x
Karen Burns-Booth says
You must make sure you really flour (rice flour) your proving basket before putting in the dough. I’ve never proved in the baking container before, but you could try it as you say. Let me know how you get on. Karen
Peter McCall says
I just made your sourdough recipe and doubled it. Thank you for a really wonderful recipe. It was perfect, really tastey and has a great crumb and flavor. It was one of the simplest bakes I ever did and the cold start and spraying water into the DO made for a tender crust. This is now my go to recipe for bread. The one thing I did was when I put the first loaf in the DO, I put the other in it’s banneton into the fridge. Worked just great and the second loaf was actually baked nicer than the first. I would have taken a picture of that loaf but my son and his fiancé grabbed it going out the door. Oh well, just have to make more.
Karen Burns-Booth says
Thanks so much for letting me know Peter – that’s so lovely to hear and I’m thrilled this is your to go to sourdough recipe now. Karen 🙂
Glynis Rowntree says
I noticed, on the last letter, mention of spraying the crust in the DO. When do you do this? This is the first time I have read this although my bread using your recipe is always good.
Glyn
Karen Burns-Booth says
I can’t see where it says that? Can you help share where it says that please?
Glynis Rowntree says
Hi Karen,
This is the letter I referred to.
Peter McCall says
22 June 2020 at 4:08 pm
I just made your sourdough recipe and doubled it. Thank you for a really wonderful recipe. It was perfect, really tastey and has a great crumb and flavor. It was one of the simplest bakes I ever did and the cold start and spraying water into the DO made for a tender crust.
Karen Burns-Booth says
Ah I see – this was done by a reader here and not by me, I would spray as soon as you put the dough in the DO. Karen
Glynis Rowntree says
Thank you, Karen.
Karen Burns-Booth says
No problem
Frances says
Hi Karen. Can you help, please! I’m worried that my starter has died – it was lovely and bubbly, smelling sweet and sort of apple-y a few days ago, but now it seems completely lifeless. I discarded half of it this morning and have fed it with wholemeal and strong white flour. Any tips to bring it back to life? Thanks. Frances
Karen Burns-Booth says
Hi Frances, cut back on the wholewheat flour, and feed and discard 2 to 3 times with extra strong white bread flour, and see how it is then.
Sandi Sherman says
I started this morning and plan to put in the fridge to proof and bake in the morning. The proof time will be longer, but I think the cooler temp should work. I don’t like to be doing the final steps in the evening; I hope this works. Have you ever done this?
Karen Burns-Booth says
Hi Sandi,
Whatever suits your schedule is fine, I just prefer the prove to be overnight whilst I am sleeping, so the dough is ready first thing next morning!
I am not doing the final steps in the evening, I am simply folding and turning, then placing in a banneton to prove overnight, the final steps come next day.
BUT, you MUST work to a timetable that suits you and I am sure this will be fine!
Karen
Sherman Sandi says
It worked out very well.
Do you preheat your cast iron pot? I’ve done it both ways, not sure there is a difference.
Karen Burns-Booth says
Hi there, NO, I never pre-heat my pot, Karen
Michelle Wilkinson says
Hi Karen. Having being intrigued by the sourdough process, plus the recent difficulties getting hold of yeast, I have started my foray into making sourdough bread, yet have found many of the recipes far too complicated and massively time consuming, so thank you for simplifying the whole process! I’m hoping that you can help me with a couple of queries…
1. If I want to make a smaller loaf, do I simply scale all the quantities down?
2. Having taken my starter out of the fridge in the morning (at approx 8am) and fed it, it takes far longer than 2-3 hours to start bubbling again. Should I take it out and feed it the night before, or perhaps just take the starter out of the fridge the night before and allow to come to room temperature again before feeding in the morning?
3. As I don’t have a pantry or anywhere ‘cool’ to leave the dough overnight, I have been putting it in the fridge, but the proving process seems excessively slow and it doesn’t really double in size. (NB. my fridge is set at 5C). Is this ok – will it rise more during baking?
4. (Finally!) Can I use a proportion of malted granary style flour with the quantities in this recipe, and perhaps a tsp of malt extract or powder to boost the flavour as I have done with non sourdough breads?
I am really looking forward to trying out your other recipes as well – thanks for some inspiring ideas!
Karen Burns-Booth says
Hi Michelle,
Sorry for the slight delay in replying, I will attempt to reply now.
1. Yes, just scale the quantities down.
2. It might need feeding so, feed it and then discard what you feed it and deed it again until it is bubbly. You can also take it out the night before too.
3. The fridge is just fine, you can always take it out about an hour or two before baking.
4. Yes you can, just be aware that is needs to be the much lighter weight.
HOPE this all helps!
Karen
Caroline says
After trying various sourdough bread recipes I want to tell you how great this recipe is. It is easy to follow and gives me a perfect loaf every time. This is now the recipe I always use and recommend to others. Thank you.
On a side note I have also been making the Sourdough Hot Cross buns and Sourdough Yorkshire sticky fruit buns and giving them to family and friends, without exception they are getting thumbs up.
Karen Burns-Booth says
THANK YOU SO much for your feedback and comments here Caroline, and thanks for recommending my recipe to others too! You have made my day! 🙂 Karen
Andrea Paterson says
Hi, I had already got a starter, and wondering if it matters how much starter you have -does it still get fed with the 40/40 of water and flour at the start of making sourdough.. in essence, what amount should I start with?
Karen Burns-Booth says
Hello, it doesn’t matter how much starter you have, you still feed it 40/40 – I usally have about 230g before feeding mine, but it can vary! Karen
Alison Mullins says
Hi Karen
I would love to try your sourdough recipe. I can see you inherited your starter from your friend so can you point me to where I can get the recipe and instructions for the starter.
Thank you.
Karen Burns-Booth says
Here’s a recipe for you Alison! I used extra strong white bread flour.
Starter – use this handy chart to help you keep track of your feeding times.
On the first day, put one tablespoon of flour and one of water into a 500ml glass bowl and mix together.
Wet a clean tea towel, wring it out well, lay it over the bowl and leave in a warm place for about 12 hours.
After the 12 hours have passed, add another tablespoon of flour and another of water, mix together, cover with the damp tea towel and leave for another 12 hours.
On day two (24 hours since beginning your starter), stir in a third tablespoon of flour and a third spoon of water, stir to mix, cover again with the damp tea towel and leave in a warm place for 12 hours.
For the second feed of day two, add a tablespoon of flour and one of water, stir to mix, cover with the damp tea towel and leave in a warm place for 12 hours.
For the first feed of day three (36 hours since beginning your starter), increase the feed by adding two tablespoons of flour and two of water, stir to mix. Re-dampen the tea towel if necessary, lay it over the bowl and leave in a warm place for 12 hours.
On the second feed of day three, add two tablespoon of flour and another two of water, mix together, cover and leave for another 12 hours.
At this point your starter should be bubbly and ready to create your ferment. If the starter is not showing bubbles, repeat the 12-hour flour and water feeding routine, and ensure the starter is kept constantly in a warm place.
Alison Mullins says
Thank you Karen. I’ll give it a go as I want to make your easy sourdough sandwich loaf – it looks delicious
Karen Burns-Booth says
My pleasure! Karen
Michelle says
I’ve just taken my first loaf out of the oven. It looks great but the scores aren’t very deep, I think I will reduce the amount of water for my next loaf. I’ve had so many bad bakes over the summer, with 60% plus humidity!
Karen Burns-Booth says
It varies so much doesn’t it, according to where you live and the climate.